Showing posts with label Hero Arts. Show all posts

Wednesday, January 22, 2025

In My Thoughts...


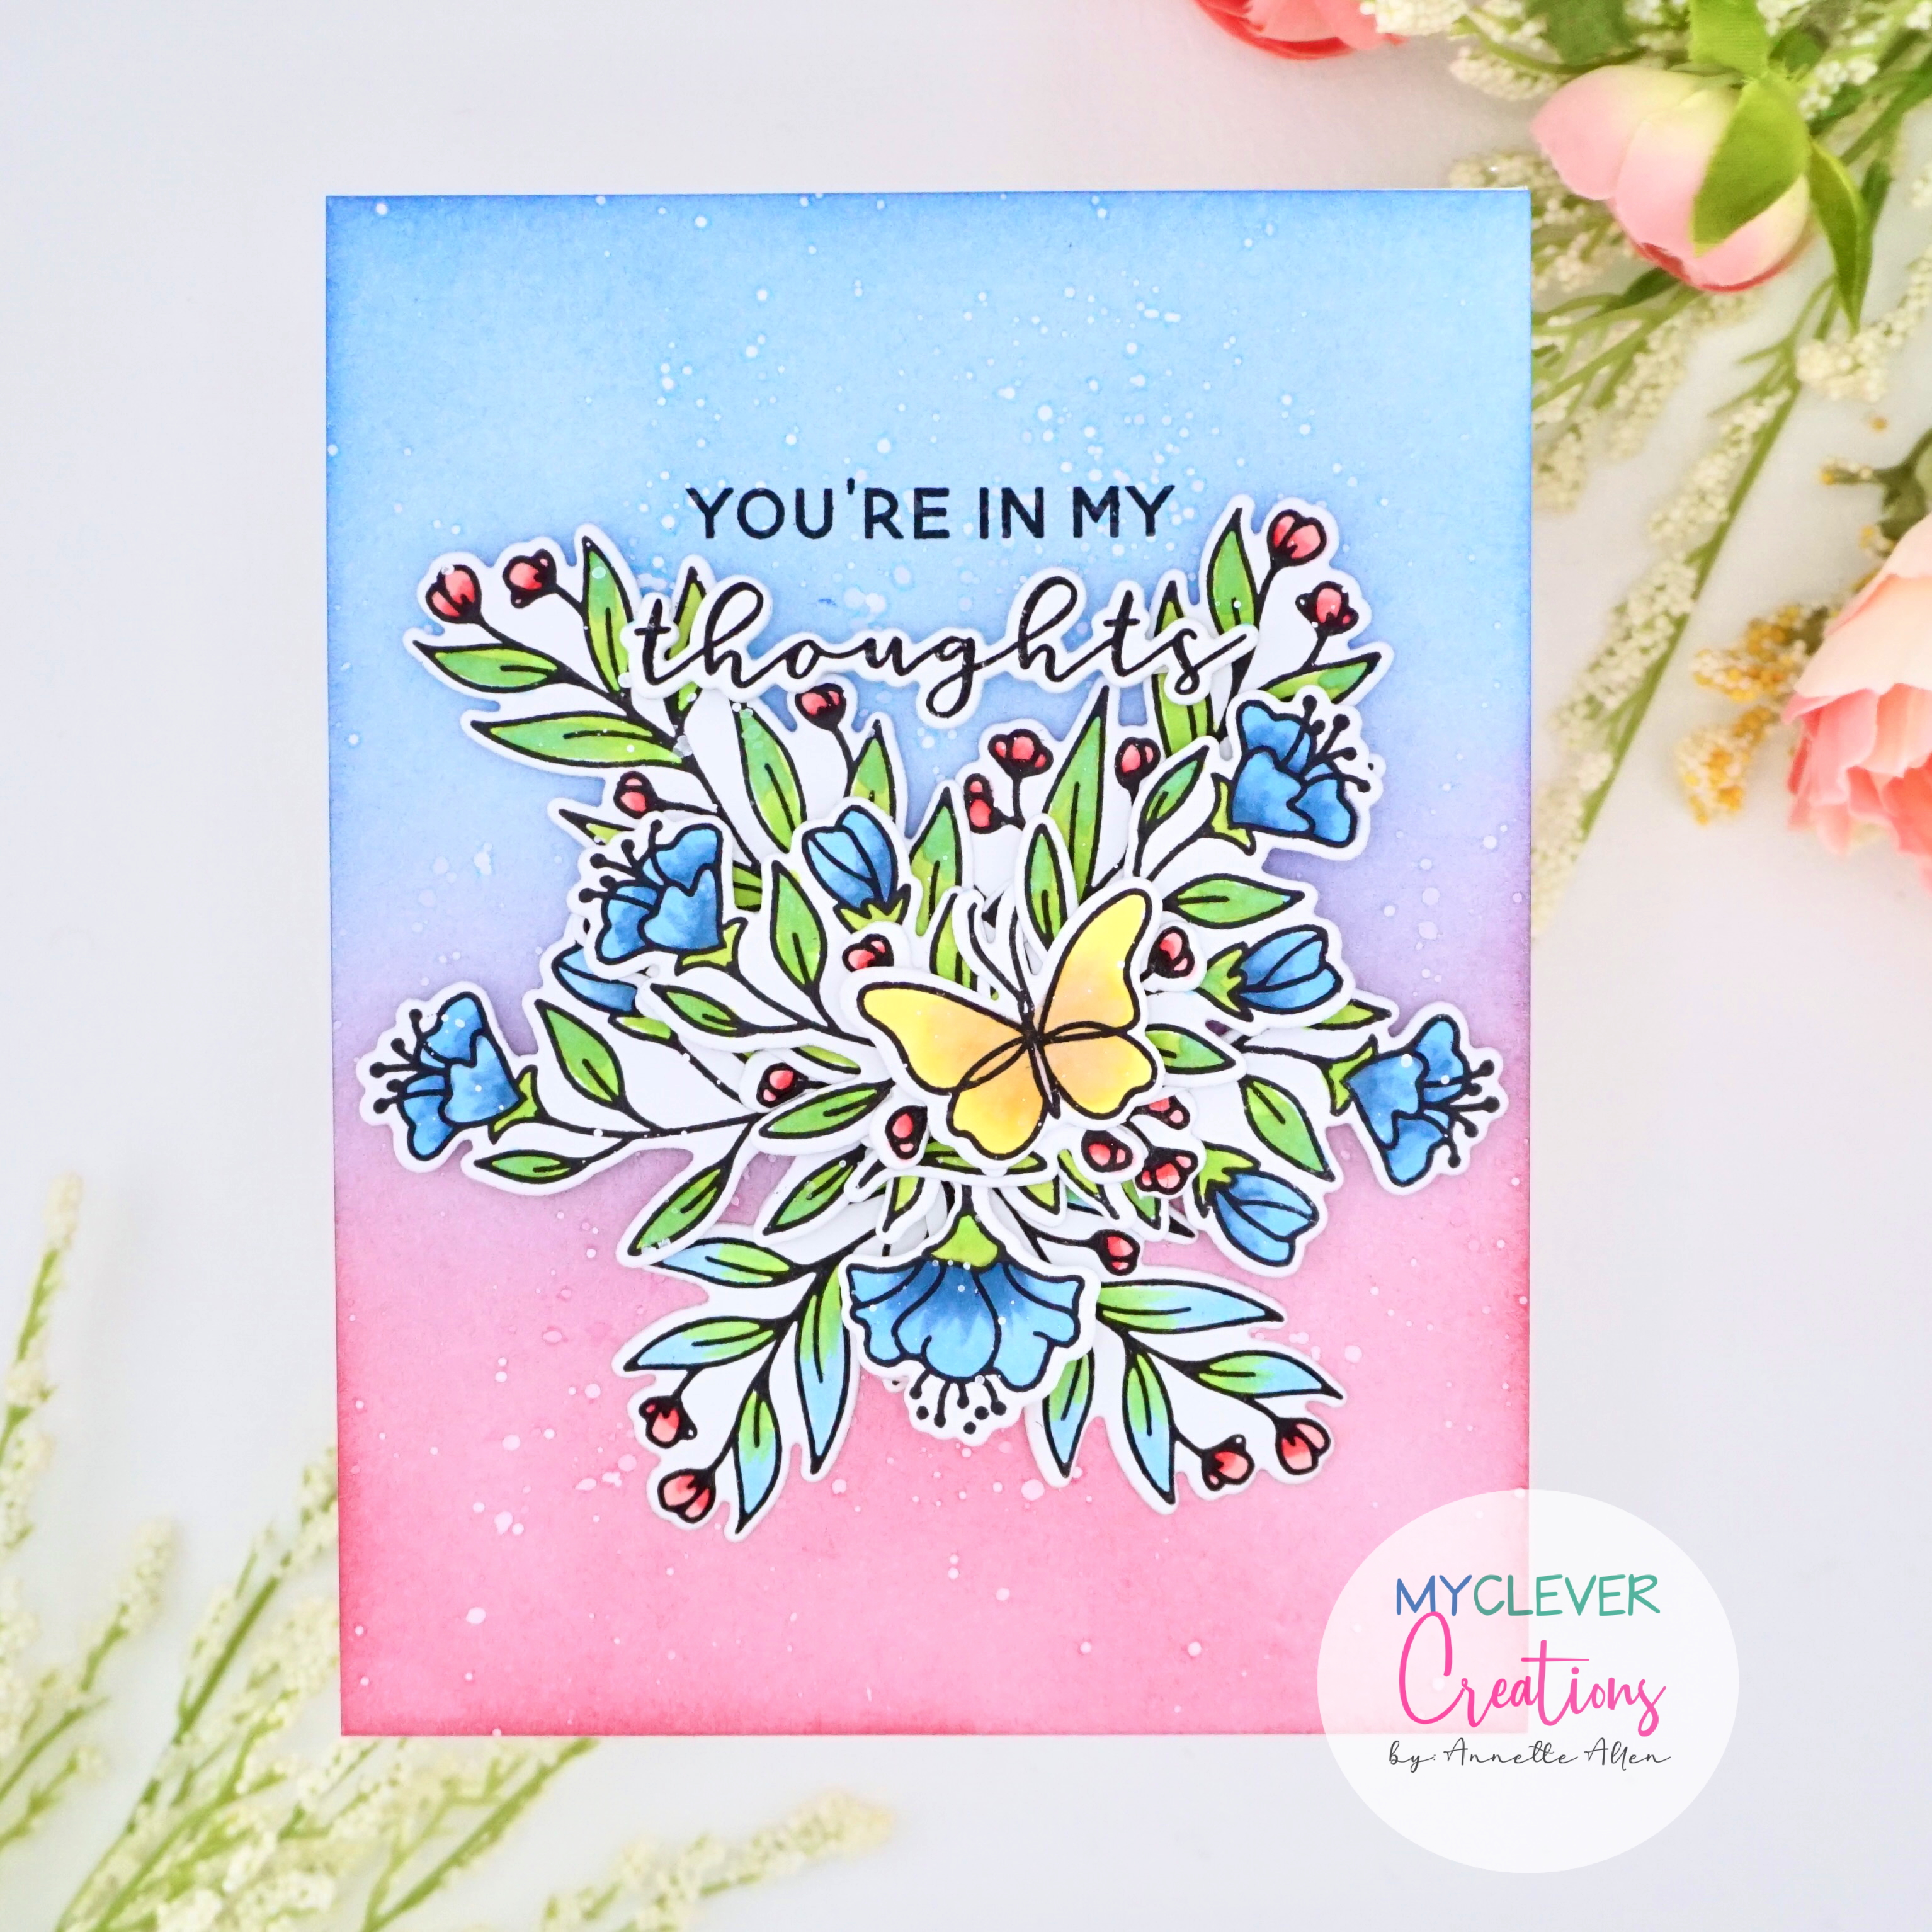
Happy Wednesday blog friends. I hope you all have been having a great week. I have not been spending much time in my craft room, I think my crafty mojo needs to be refreshed. I think we all have those type of weeks.... right? Well I managed to create this card using Hero Arts: With Sympathy stamp/die set. 


Create card from with cardstock A2 size.

Cut an A2 panel on white cardstock and ink blend Lawn Fawn: Forget-me-not and lobster ink on the entire sheet and then adhere to your card base using liquid glue.

On a piece of white cardstock stamp out all these pretty images from the HR With Sympathy stamp set using black ink and color the images using Copic Sketch Markers (R35, R32, B32, B34, Y17, Y15, YG05 and YG03). Die cut the images using the coordinating dies.

Take all those pretty images and create a floral scene in the center of your card. When adhering I used foam tape and liquid glue. I really did not have a plan when I started this, I just stamped glueing. LOL 

Stamp part of the sentiment directly onto the card above the floral design using black ink. Stamp the remaining sentiment on white cardstock using black ink and die cut using the coordinating die set. The sentiment is part of the HR With Sympathy stamp and dies. 

Mix a little Copic Opaque with water and splatter onto your card and make sure to let dry completely before handling. 
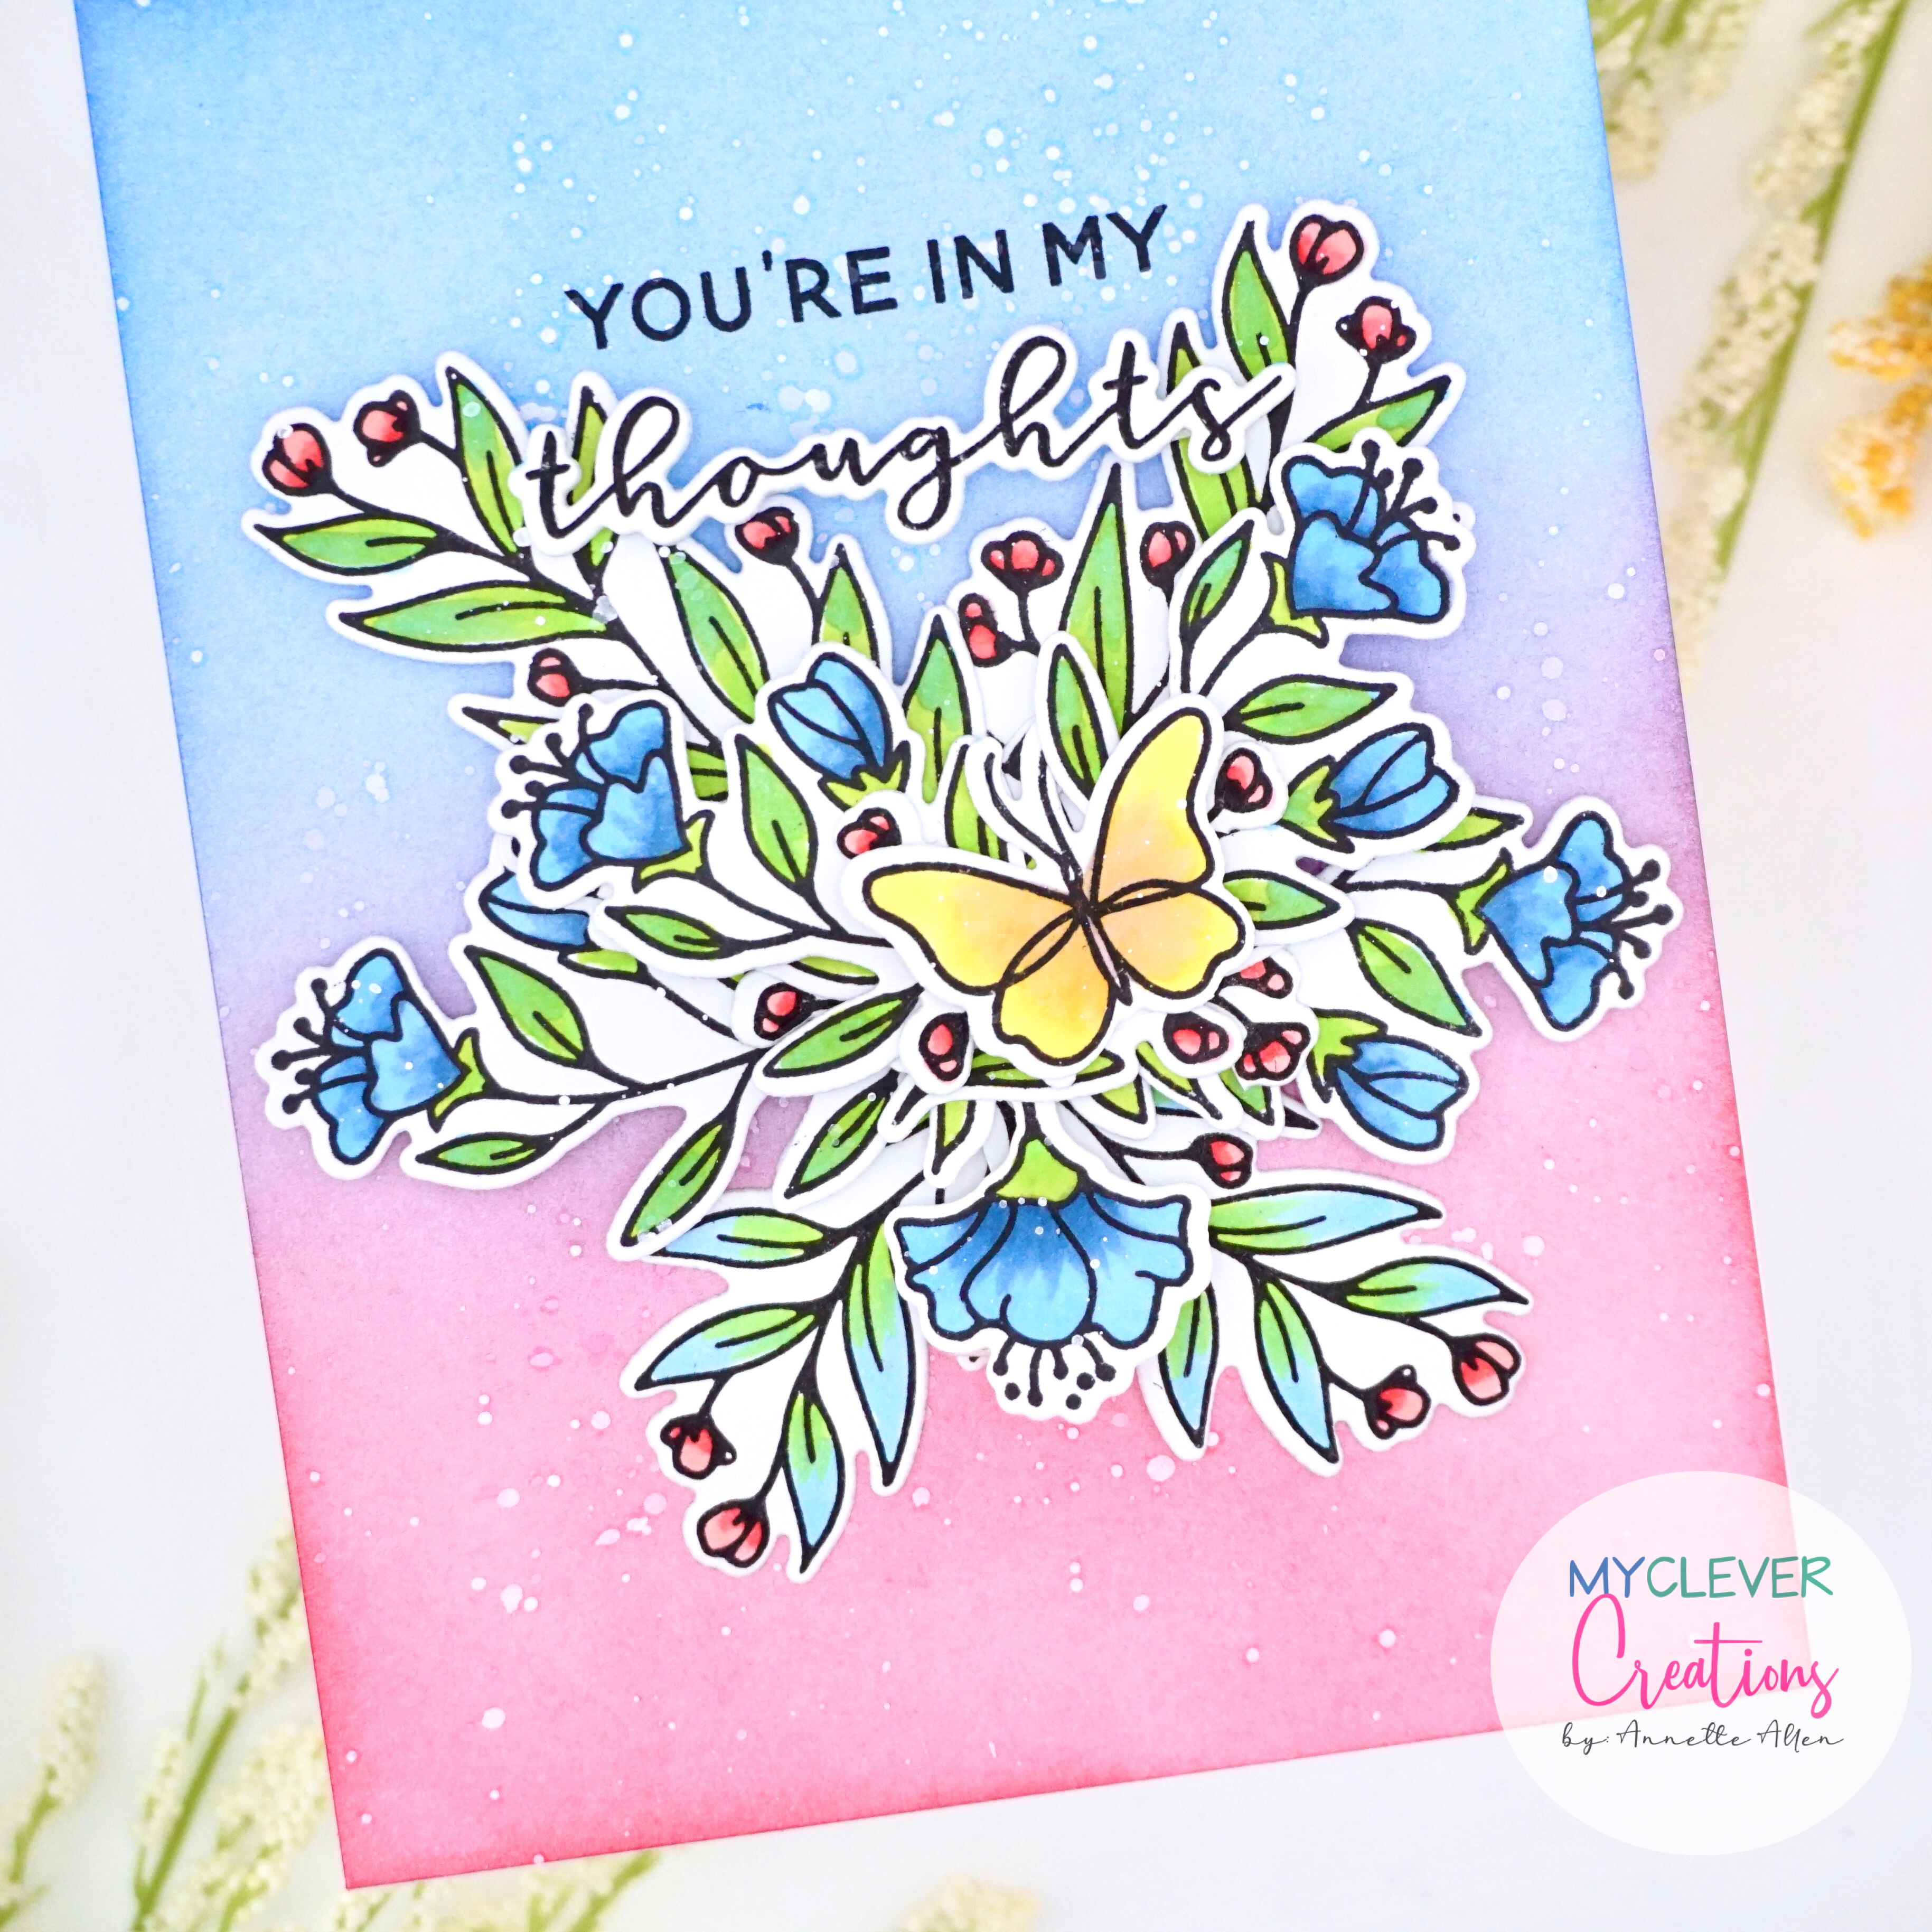

It turned out to be a very simple card to create. Not much coloring but a lot of gluing. It is a different design but you know me.... let's be different when creating. 

Thank you so much for stopping by.

Have a wonderful day.

Saturday, July 6, 2024

July Lunar New Year Challenge....


Happy July blog friends.. Today I am sharing a little inspiration for the Lunar New Year Challenge. It is July and we are ready to see your amazing projects, plus there are 4 amazing prizes up for grabs. But you have to link up for a chance to win. 

Today I am featuring one of our amazing sponsors Hero Arts... Cherry Blossom Cover Plate that I paired up with Trinity Stamps Dragon Dance. 


Create card from white cardstock A2 size. 

On a white A2 panel ink blend to different pinks. Fill the panel with the ink and then die cut this gorgeous Hero Arts Cherry Blossom Cover Plate. On the back add some foam tape here and there and adhere it to your card base. 

Take those two pinks you used and add a little water on a paint brush and pick up some of that ink and sprinkle a little of that color on the white part of the card. 

I added a little glue using my finger to the Cherry Blossoms on the die cut panel and then sprinkled a little Lawn Fawn Prisma Glitter, for a little sparkle. 

I stamped the Happy New sentiment from the Trinity Stamps Dragon Dance stamp set on white cardstock and then die cut using the coordinating dies. I added some foam tape to the back and adhere to the card. 

Stamp the other sentiment right below it using black ink. 

To finish I added some of Honey Bee Stamps pearl stickers here and there. 


A very simple card with a lot of sparkle. 

Supplies used:

THANK YOU SO ALL THE SPONSORS.

The rules are simple. You must create a new Lunar New Year, Chinese New Year or a 2024 Dragon Birthday card and add the link to your post below. Multiple entries are allowed. Backlinking to an older project is strictly prohibited.

Our July Lunar New Year Challenge will run from 12:00am EST on July 1, 2024 through 12:00pm EST on July 31, 2024. We would love to see you using products from our four generous sponsors! The four lucky winners will be randomly selected from all eligible entries and announced at the start of the July Challenge.

Visit the July Link-Up Party post HERE to see all of the design team projects and be inspired to create your own! When sharing your challenge entries on social media, feel free to save this badge and post it along with your project. Please tag us @lunarnewyearchallenge on Instagram and use the hashtag #lunarnewyearchallenge so everyone can find and be inspired by all your amazing projects.

Wednesday, May 22, 2024

Hero Arts CommUNITY guest designer...


Happy hello blog friends.. I am so excited to share that I was asked to guest design for the Hero Arts CommUNITY. You can see the guest post on the Hero Arts blog HERE


On a piece of Dove White cardstock measuring 4" x 5 1/4", stamp United People Bold Prints with Hero Arts Fruit Punch, Bubble Gum, Creamsicle, Green Apple and Lemon Drop inks. I started with one color and just rubbed the ink from top to bottom the width of the mini ink cube. I then added some Clear Embossing and Watermark ink and stamped the images again. Make sure to leave your stamp in place so it will stamp directly in the same place. Now heat emboss using Clear Detail Embossing Powder. This will make the colors more vibrant.


Cut an A2 panel of Azalea carstockand and adhere your stamped panel using foam tape. Now adhere the Azalea panel to your Dove White card base. Trim one strip measuring 1/4" each of Papaya, Azalea and Cherry cardstock. Adhere them to a piece of Dove White cardstcok at an angle, trim down and add to your colorful background. Stamp the "fabulous" sentiment from the Textured Complimentsstamp set on Cherry cardstock using Clear Embossing and Watermark Ink and heat emboss Detail Black Embossing Powder. Trim down the sentiment and adhere to card using foam tape. Stamp the "you are" sentiment from the same stamp set on Dove White cardstock using Intense Black ink, fussy cut around the sentiment and adhere to card using foam tape.


On a Dove White cardstock panel measuring 3 3/4" x 5", stencil the sun from the Clouds and Grass Scenic Stencil using Lemon Drop ink. Start in the middle and use a light hand when added the ink. Cover your panel with this sun stencil. Stamp every sentiment from the Textured Compliments set on your sunny background using Granite ink. Start at the top and line up two sentiments and stamp. They will not fit completely but that is ok. Stamp the entire panel, just make sure to offset your sentiments when stamping each line.


Cut a panel of Granite cardstock measuring 4" x 5 1/4". Adhere your stamped panel with foam tape to the grey panel and then adhere it to your white A2 card base. Stamp the "you are" sentiment on Dove White cardstock using Intense Black ink, fussy cut around the sentiment, add some foam tape to the back and adhere it to the left, middle side of the card. Stamp the heart from the Textured Compliments set using Granite ink on Dove White cardstock, fussy cut, add some foam tape and adhere to card. Finish with a few Midnight Black Accent Pearls. And that's it! Two beautiful cards made using products from the Hero Arts Unity Collection.


Don't you just love these amazing sets? I had a blast designing with them and I hope that I have inspired you today. Remember to be kind and love everyone. It is a wonderful thing to be able to love everyone. God is amazing.

Thank you all for stopping by.
Have a blessed and wonderful day.

Thank you to Dana Joy and Pocono Pam ♥︎ 

Tuesday, July 18, 2023

Sunny Day...


Happy sunny hot day blog friends. It is humid and sunny outside today. Thank you Lord for air conditioning. I was on FB and seen that Scrapbook & Cards is having a color challenge and well this is what happened after I seen the inspiration photo. I loved the colors and well just had to get crafty.

Today's card was created using...
  • Hero Arts: Layering Palm Tree Pair die set
  • Lil'inker Designs: Sunshine dies
  • My Favorite Things: Sunny Vibes


Create card from white cardstock A2 size.

Cut 1 inch strips of different colors of cardstock and adhere them to the lower part of the card base. 

Cut 1/4 inch strips of white cardstock and adhere them onto of the color cardstock. Create some fun strips. 

On a separate piece of white cardstock, ink blend some Ranger oxide inks (greens and browns). Blend the ink so you can die cut this fun Hero Arts palm tree. 

Die cut the sun out of yellow cardstock. Adhere the sun to the upper right hand corner of the card.

Add some foam tape behind the palm tree and adhere it to the card.

Stamp the sentiment on a piece of colored cardstock using embossing ink and heat emboss white embossing powder. Cut down the sentiment and add it to your card.

Nothing like a big palm tree and colorful strips to brighten up a card. 

That is all for today.

Thank you so much for stopping by.

Monday, June 19, 2023

Just For You...


Happy Monday everyone. Today I am linking up to the Hero Arts: Stay Crafty with a Blog Named Hero. I have not linked up to a challenge in along time. I thought it might just be a fun way to start my crafty week. 

Today's card was created using Hero Arts:

  • Protea Flowers stamp set


Create card from white cardstock A2 size.

Stamp these beautiful Protea flowers directly onto the card base using black ink.  Color the images using your favorite medium. I colored using Copic Sketch markers (R27, R24, R22, R21, YG25, YG23 and YG21) I added some of Pink & Main Touch of Gloss to the bees. Make sure to let dry completely.

Die cut a scalloped circle on white cardstock and stamp this pretty sentiment from the Protea Flowers stamp set. 

Cut a strip of white cardstock and a piece of black cardstock slightly smaller than the white. Adhere them together and then to the card. Now add your sentiment using foam tape to the right side of the card. 

Finishing with a few black gems here and there.


That is all for today.

Thank you for stopping by.
Have a wonderful Monday!

Wednesday, February 22, 2023

Stay Crafty with A Blog Named Hero: Animal Crackers Challenge...


Welcome blog friends..
Today I am sharing another fun card for the Stay Crafty with A Blog Named Hero challenge.
The theme is Animal Crackers and you still have time to link up HERE.

Here is a little more inspiration for you...


This card was created using Hero Arts...

Create card from cardstock A2 size.

Cut a separate piece of white cardstock, the same size as the card front and with your Hero Hues (mini ink pads) slide the entire ink pad along the paper rotating the colors.

Die cut the Hero Arts Papel Pelado Confetti Die on your colorful background and adhere to the card base.

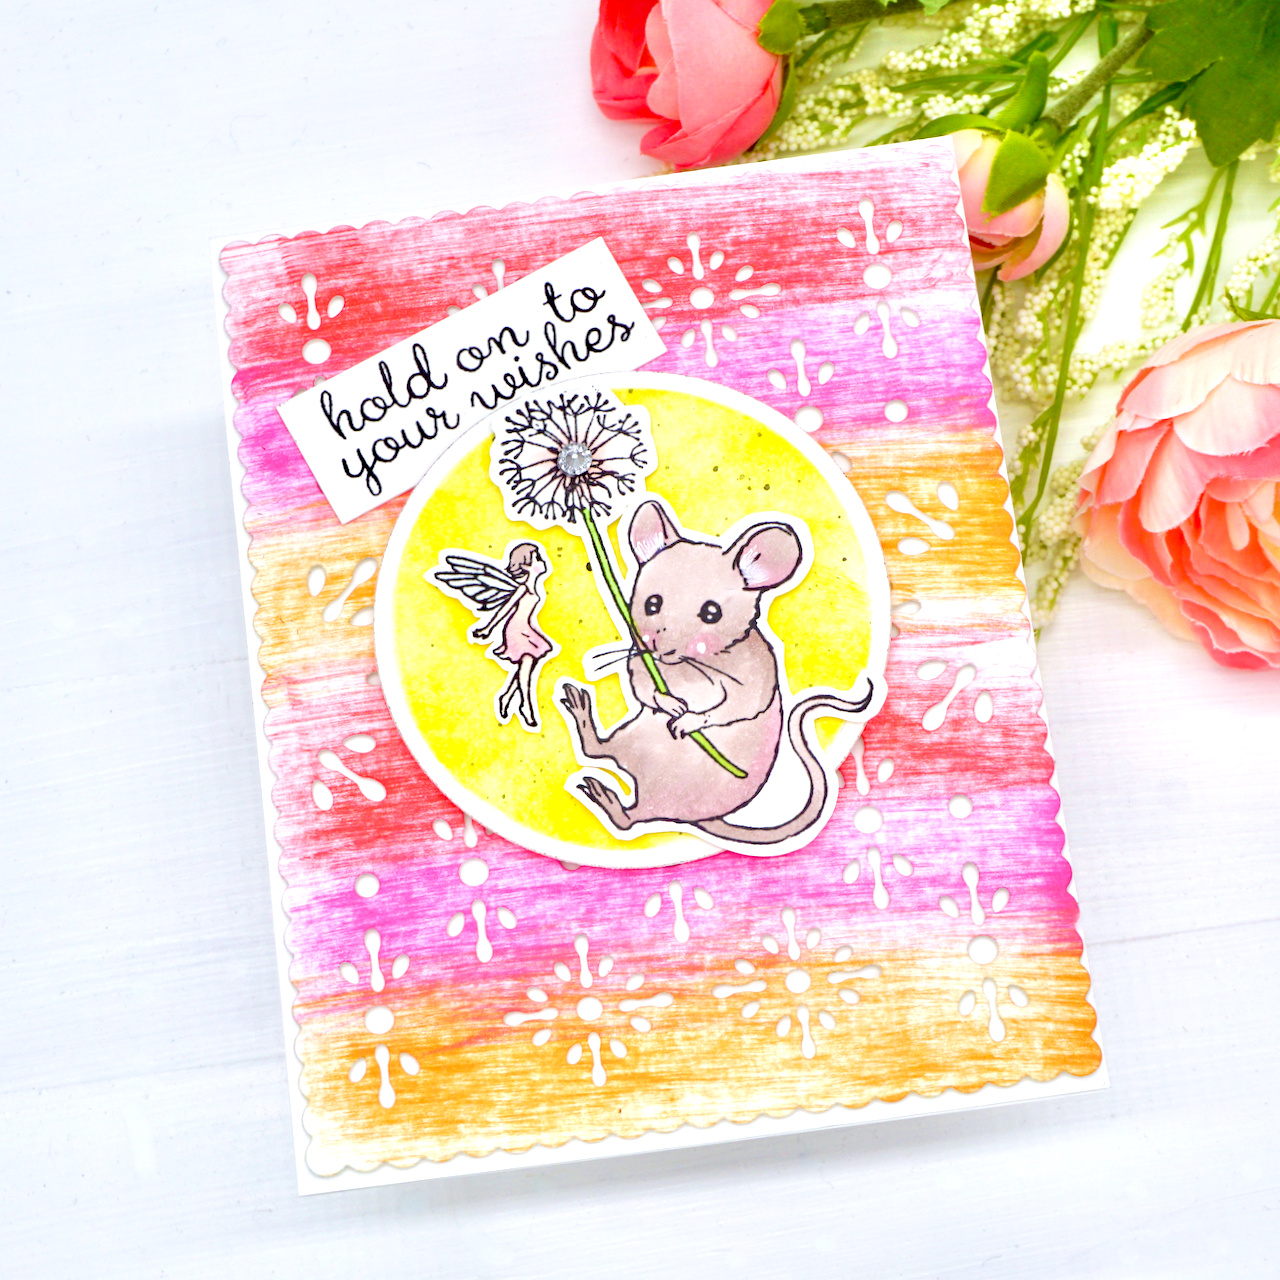
Stamp out these adorable Make A Wish images and color using your favorite medium. I used Copic Sketch Markers. Die cut around the images and set aside. 

Die cut one of the Hero Arts Nesting Circle Infinity Dies on white cardstock. 

Leave the die on the circle and ink blend the Hero Hues Lemon Drop onto the circle. When you lift the die you should have a white border around the circle.

Using Foam Tape adhere your images to the circle and then add the circle to your fun color background. 

Stamp the sentiment from the Make A Wish stamp set on white cardstock, trim and adhere to your card. 


Now it is time for you to link up those fun Animal Crackers cards... Any animal qualifies, Just make sure to use Hero Arts in your creations.

Thank you so much for stopping by.

Have a wonderful Wednesday full of smiles.

Thank you Stay Craft with A Blog Named Hero for having me as a quest designer this month.

Friday, February 10, 2023

Stay Crafty with A Blog Named Hero... Animal Crackers Challenge


Welcome blog friends.. today I am excited to share that I am guest designing for Stay Crafty With A Blog Named Hero and the new challenge for February is Animal Crackers. You can link up your cards HERE on the Hero Arts blog


This card was created using Hero Arts...

Create card from cardstock A2 size.

Ink blend the 4 inks listed above directly onto a piece of white cardstock, measuring the same size as your card front. 

Stamp the HA You Make A Difference floral background to the top of the blended background using black ink. 

Take a white gel pen and highlight the flowers here and there. 

Sprinkle a little of Copic Opaque on the entire background and set aside to let dry. Once it is dry adhere the background to your card base. 

Stamp these sweet images from the Make A Wish stamp set and color using your favorite medium. I used Copic Sketch markers. Die cut or fussy cut the images and add them to your card using foam tape. 

Finishing with your sentiment that is also stamped directly onto the ink blended background. 


Take out your Hero Arts animal stamps and link up for a chance to win. You can link up HERE on the Hero Arts blog

Thank you for stopping by.
Have an awesome day!

Thursday, February 3, 2022

Kindness...


Happy Thursday everyone. Today I have created a card for the Stay Crafty with A blog Named Hero: February Challenge... Anything Goes. So I took out a few of the oldies and created this card. 

This card was created using Hero Arts:


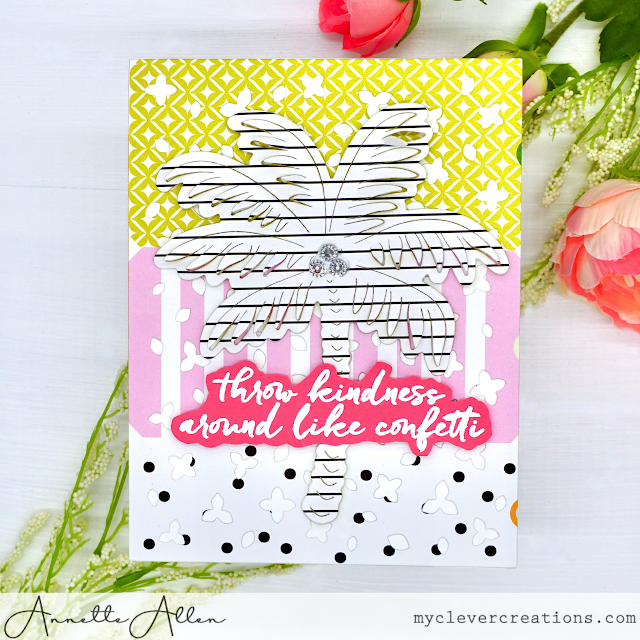
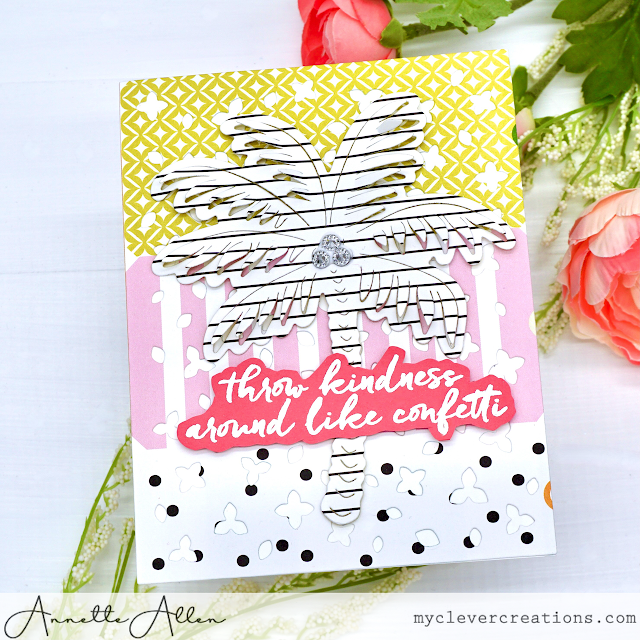
I used some misc. designer paper and die cut the Flower Confetti background die and then adhered it to my card base. The designer paper had all three patterns on it, so I did not have to die cut it three times. It just looked cool already. 

I then die cut this cool Paper Layering Palm Tree on some black and white striped designer paper. I wanted a little shine so I added some misc. gems to the center of the Palm Tree and then adhered the palm tree to my card using foam adhesives. This give the palm tree a little dimension.

Finishing up with heat embossing this fun sentiment from the Acts of Kindness stamp set on a piece of pink colored card-stock. I did a little fussy cutting around the sentiment and then added it to my card. 


Stay Crafty with A blog Named Hero: February Challenge... Anything Goes

That is all for today.
Thank you for stopping by.

Have an awesome Thursday!

Thursday, December 16, 2021

Very Merry Christmas....


Thursday Thursday.... we are getting closer to Christmas. YAY! Are you ready? I totally am. Next week is tamale week. I am going to make a bunch of tamales and share with my neighbors. Hope they come out good. LOL

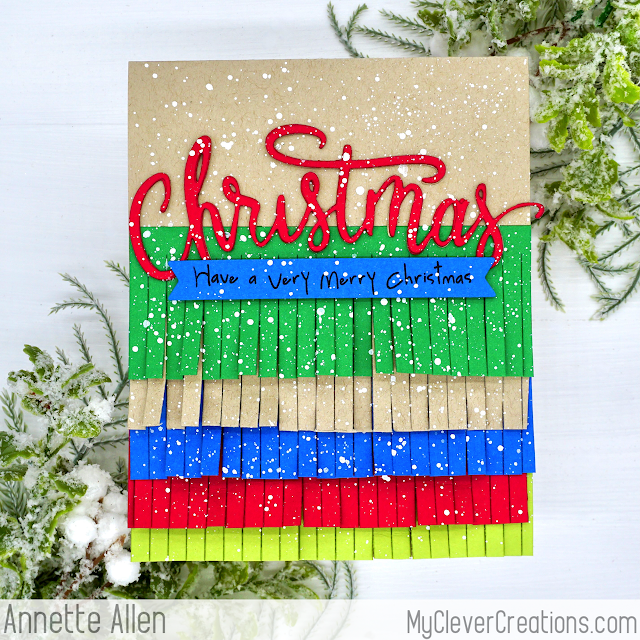
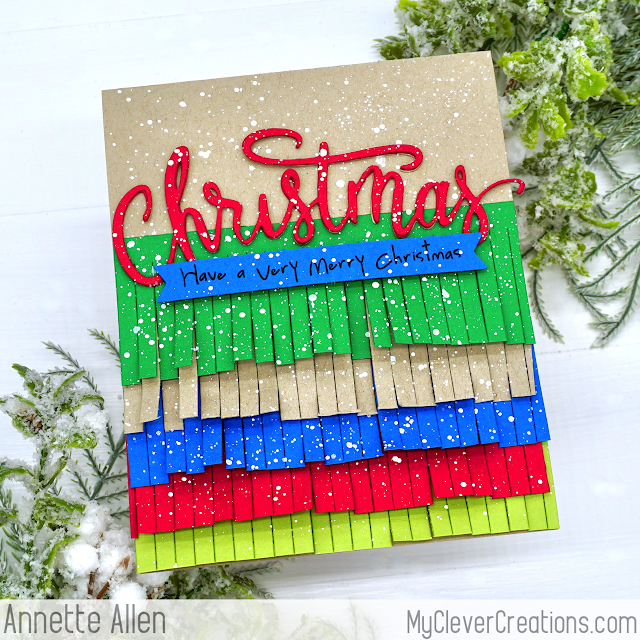
Today I created another Christmas card. I just can't stop... Christmas cards are just fun. This card was created using Hero Arts: Christmas Word Fancy die, Fiesta Fringe Fancy die and Make Yourself at Home card kit. 

I started with die cutting this fun Fiesta Fringe Fancy die on misc colored card-stock. I just pulled out my scrap color card-stock and started die cutting. I kind of went with the traditional colors of Christmas. I then adhered them to my card base. I left the top half because I knew that was where I wanted to place my Christmas Word fancy cut.

I sprinkled a little Copic Opaque and then decided that I need more of a sentiment. So I die cut the Taylored Expressions Simple Strips Backer on the blue card-stock and stamped this sentiment from the Make Yourself at Home card kit. I added some foam adhesives to the sentiment and added it to my card. I then had to sprinkle a little more Copic Opaque so it blended with the rest of the card.

Another Christmas card done... YAY!

That is all for today.

Have an awesome day full of smiles.

Thank you for stopping by.

Monday, November 15, 2021

Very Merry Christmas...


Happy Monday blog friends. I hope you all had a wonderful weekend and getting ready for this new week. I am back on the Christmas card kick and with this new Joanns Hero Arts exclusive make Yourself at Home card kit, sure does make for easy card making.  This kit is only available at JoAnn's. 


I stamped the background onto my card base as I rotated the colors. This kit comes with 4 ink mini pads and you are seeing all the colors on this one card. 

I then stamped out the trees and die cut using the coordinating die which is also included in this kit. This kit comes with a rubber background stamp and a clear stamp set. Both is what you see on my card today.

Before adding the sentiment I sprinkled a little Copic Opaque, this is not in the kit.

I do not normally buy kits but when I seen this one I knew I just had to have it. It also comes with embossing powder, glitter and colored card-stock (red and green). So many more card to create using this kit. 

That is all for today.

I might ink up another using this kit and share tomorrow.

Thanks for stopping by.

Have a wonderful Monday! 

Thursday, December 3, 2020

Merry Christmas Wreath...


MORE Christmas cards.. I am on a roll and more coming soon. I am getting the use of many of my stamps and dies and I love mixing them all together. 

I created this card using Hero Arts: Paper Picado Confetti die, Avery Elle: Pup Up Wreath die, Pink and Main Sentiment Strip Dies, Pink and Main: Layered Circles dies, Lawn Fawn: Reveal Wheel Holiday Sentiments stamp set, NUVO White Crystal Drops Lawn Fawn: Let It Shine paper pad and Avery Elle: Tis The Season paper pad. 

Now that's a long list of supplies, but as you can see they are very simple to create. 


I die cut the Hero Arts dies on the designer Elle's Studio paper and adhered to my card base.


I die cut the Avery Elle Wreath with one of Pink & Main Layered Circle dies so it cut out into the circle. I adhered the wreath using foam adhesives so it gave it some dimension. Next I die cut the cute bow also included in the AE Wreath die set and glue it together and centered it onto my wreath. I then stamped out the Merry Christmas three times on plain white card-stock and die cut using Pink & Main: Sentiment Strip dies. I adhered the sentiment to the center of the bow and adhered the bow to the wreath. Finishing up with added a little NUVO white crystal dots here and there. 

That is it.... totally simple and little stamping. I let the dies do all the hard work. Another set of three Christmas card done and more to go. Wish me luck.

Thanks for stopping by.
Have an awesome day.


Monday, March 30, 2020

A Bit of Kindness...


AND I am back with another card. I seen this Hero Arts Challenge... Stay Crafty with Hero Challenge #2. So I thought I would link up. 


I used on one of my Ranger alcohol ink backgrounds with this pretty Paper Picado Confetti  panel die. I just love this die. The pattern is so awesome. Plus I can get over how fun this Palm Tree die set is. Beach Theme... ah, yes please. Totally simple card to create. 


That is all for today. But I think I said that in my last post. LOL
I just happen to have a lot of time on my hands.

Thanks again for stopping by.
Happy Crafting!

Wednesday, March 4, 2020

BIG Thanks...


Mid-week... yippee. It is in the high 60's today and I am loving it. I have a few windows open and I can hear all the happy birds chirping. Makes for a peaceful day.  With that being said I was also in a colorful mood so I created this Lawn Fawn/Hero Arts card. 


Funny thing I have had the rainbow and big thanks sets for a while and this is the first time using them. How did that happen? I used some shimmer paper I got at Micheal's for the rainbow and added some colored card-stock behind the background die so it looked like the sky and grass. 

The images are colored with Copic Sketch markers and I did a little fussy cutting because I do not own the coordinating die set. I of course added some scotch foam adhesives to give some of the images some dimension. 

Finishing up with this fun sentiment. 

That is all for today.
Thanks for stopping by.

Wednesday, December 18, 2019

A Big Hug...


Wednesday Wednesday.... we are midweek and so close to another weekend. Yippee... 

Today I created a card using Hero Arts: Paper Layering Bear with Frame and Taylored Expressions: Just A Note stamp set


The created this background using bits of American Crafts cardstock. I sprinkled with a bit of Copic opaque. Totally simple card to create. I adhered the cardstock to the base of my card, die cut this cute bear and adhered it to my card using foam adhesives to give it some dimension. Finishing up with this fun sentiment. That is it crafty peeps... too simple... right?

Thanks for stopping by.
Have a wonderful day!

Tuesday, December 17, 2019

Christmas Fancy Deer....


We are getting closer to Christmas yay. I am still making Christmas cards. I just have so many fun dies I have not used yet, so today I am sharing a Hero Arts card. I created it using Hero Arts: Winter Deer Fancy Layered die, Flower Confetti Fancy die, Christmas Fancy die and Lawn Fawn Winter Otter stamp set

This Winter Deer Fancy die set is so pretty. I love all the fine detail in this die. You have seen me use this Christmas die before. I just love the script and well it is one of my most favorites. 


The background color was added using water and alcohol inks. When that was dry I use the Hero Arts Flower Confetti Fancy die. I used foam adhesives to give the deer some dimension. The sentiment was cut mulitiple times and glued together for more dimension. Finishing up with stamping this small Merry Christmas from the Lawn Fawn Winter Otter stamp set

Totally simple card to create. 

Thanks for stopping by.
Have an awesome day!

Saturday, December 14, 2019

Christmas Rudolph...


Happy Saturday everyone. I made this card yesterday and well I have not posted on a Saturday in a long while so here ya go. Remember I used this deer die cut before and said it would in another card soon, well here it is.


I went for another non traditional color themed card. Got to love pastel colors... right? I think they look so fun on this kraft card-stock. Totally simple card to recreate. Just die cut the sentiment and Rudolph many times and adhered it to your card base. I added some Copic opaque just because I can and well it gives it that snowy look that I love. 

That is all for today.
I hope you all have a fantastic weekend.
Thanks for stopping by.

Tuesday, December 3, 2019

Christmas Houses....


More Christmas cards YES.... are you making Christmas cards too? Do you pull out some of your older sets or do you just use all newly releases stuff? I have lots of favorites and this die is one of them.

I created this card using Neat & Tangled: Warm Winter Scene Cover Plate, Newton's Nook Designs: Petite Snow Stencil and various pretty MFT designer paper. The sentiment is from Hero Arts: Christmas Word Fancy Die


I stenciled the background first and then die cut the Neat & Tangled: Warm Winter Scene Cover Plate many times and pieced together this little winter wonderland. Seriously love this die. LOL Simple card just lots of die cutting. I think I will make more with all the left overs I had. 

Well that is all for today.
Thank you for stopping by.