Showing posts with label Pinkfresh Studio. Show all posts

Tuesday, January 6, 2026

Sweet Angel...


Happy Tuesday everyone.... I am slowly starting to post on my blog again. I had meant to post more since the last post but I have been fighting a terrible cold. It will just not go away. Im SOOOO over it. I am still coughing, which is such a drag. But, today I have managed to create this card. 

I have found a new love for Poppy Stamps. They make the cutes dies and the Nordic collection I have to say is the sweetest. I only have a few and hope to grow my collection. So let's get started shall we? 
 

I am keeping it simple, just because it is all about that sweet image.

Create card from white cardstock A2 size.

Cut an A2 panel on green cardstock and adhere it to the card base using liquid glue.

Die cut a fun lace background pattern on vellum and adhere to the card using foam tape for dimension. 

Die cut a 3 1/2 inch circle on black and white paper and adhere to the center of the card also using foam tape.

Die cut all the pieces of the Poppy Stamps Nordic Sweet Angel on colored cardstock. I am always a pink and orange kind of gal, so I went with that color combo. Choose colors that make you happy, it will look amazing I am sure.

Adhere all the pieces together to create this lovely angel using liquid glue. 

Add foam tape to the back of the Angel and adhere to the center of the card....

YOU ARE DONE....


That is all for today.

I am off to make some more tea to help my cough. 
Thank you for stopping by.

Have a blessed and wonderful day!

Tuesday, February 18, 2025

So Much Love...


Welcome blog friends. I have not posted for a few days. I do post more on my Instagram page, so if you want to see all my creations, please follow me on Instagram HERE. Yesterday I inked up these fun new Pinkfresh Studio hearts using the Radiating Hearts and Stars stencil and coordinating die set. The stencils line up perfectly and you can really get colorful with adding your color. So let's get started.


Create card from white cardstock A2 size.

On an A2 panel adhere strips of colored cardstock that match with the inks you choose for the hearts. It does not have to match completely. I just used what I had. I adhered them using liquid glue. 

Mix Copic Opaque with water and splatter your colorful background until you are happy with the result. 

Take some scissors and cut off the edges in the top right corner and the lower left corner. 

Adhere this panel to your card using liquid glue.

On white cardstock, stencil the Radiating Hearts and Stars stencil using the same colors as your cardstock, or as close to the color as you like. There are five stencils, so have fun ink blending. Use the coordinating die set to cut all the hearts and stars out. We are only using the hearts... keep the stars for another card. 

Layere the hearts onto your fun background using foam tape. 

Stamp the sentiment from the Sending Love stamp set on white cardstock using black ink. Die cut the sentiment using the coordinating die set. Adhere to the card using liquid glue. 


Simple, colorful and fun.... don't you think? 

Thank you so much for stopping by.
Have a wonderful day.

Monday, January 13, 2025

I Appreciate You...


Happy Monday blog friends... it is already January 13th. As most of you already know I live in CA. I want you all to know that I DO NOT live by the fires but I do ask for prayers for all the firemen and residents that live in this area. We do have a close friend who had to protect his home and thank God the fire did not take it. We also had a Church member whose brother needed his dialysis and the power was out and he lost his life. 

Life can change in a moment and I think this is a great example of how we should start paying more attention to whom we put into office... ie Mayor, Governor ect. CA government has failed the people of CA. This kind of tragedy can happen anywhere and it has. Maui also experienced this tragedy and again the government has let them down. I know because the Maui fires affect my husband's family.  

We have to take care of the AMERICAN people, as this is our country. CA has given and is giving so much money to illegal immigrants and I already know that most of the people whom have lost their homes are going to have to fight to rebuild. You all know about the insurance companies. Can they pay these people or will it put them in bankruptcy? We are not blind nor dumb, just open your eyes and put your faith in front of it all. only through God can we survive any of this madness going on in this world right now. 

I am sorry to rant on my blog, but I do feel with all my heart that we need to wake up. God is calling us and wants us to turn to him. The devil is out there and he has a hold on people THAT CAN BE BROKEN if you open your heart to our Lord Jesus Christ. 


Let's get to this card that I created. 

Create card from white cardstock A2 size.

Die cut the Pinkfresh Studio Sparkling Diamonds die on purple cardstock. Set aside.

Cut an A2 panel on green cardstock and adhere it to your card base using liquid glue.

Stamp out these floral images from the Pinkfresh Studio Sending Love stamp set and stencil the color using the coordinating stencil set and then die cut using the coordinating die.
(inks used: Pinkfresh Studio Passion Fruit, Coral Reef, Spruce Tips and Eucalyptus)

Adhere these floral designs to the top of the die cut background using foam tape. Trim all the purple cardstock as the top of the floral design, as seen in photo. Now adhere this background to your card base using liquid glue.

Stamp out the sentiment from the Sending Love stamp set on white cardstock using black ink and then die cut using the coordinating dies. Add some foam tape to the back and adhere it to the center of the card. 

Finishing with a few clear dew drops.


A very simple card and don't you just love those floral designs? My ink smeared just a bit but I decided that is what makes it homemade. I really do not go for perfection, just pretty. 

Thank you so much for stopping by.

Have a blessed day.
May God be with you all.

Monday, December 23, 2024

Joy...


Happy Monday blog friends. I am off to a late start today. I just got home from my nieces wedding in Maui. The wedding was beautiful. Now we are home and trying to catch up on the little things. I made this card last week but had no time to post it. 

Card designed using Pinkfresh Studio: Holiday Gifts stamp/dies/stencil set and Geometric Tile stencil. So let's get started. 


Create card from white cardstock A2 size. 

On a white A2 panel stencil the Geometric Tile stencil using blue, red and green ink. Adhere the  panel to your card base using liquid glue.

Stamp, stencil and die cut the Holiday Gifts set. Use colors that you love. I used the same inks as the background, I just used a light hand when blending the colors. 

Die cut the envelope that is included in the die set. 

Arrange the gifts a way that you are happy with. You should use liquid glue and foam tape when overlapping images. 

Add foam tape to the back of the envelope and add it to the card. 

Stamp out the sentiment on white cardstock using black ink and then die cut using the coordinating dies. This is all part of the same set. Add the sentiment to the card using from tape. 

Mix Copic Opaque with water and sprinkle the card until you are happy. 


Never too late to create Christmas cards. I might be using this next year to send to friend or family member. It is always good to have a stack of holiday cards started. 

Thank you for stopping by.

Have a wonderful Monday and week.
Sending you all smiles. 

Saturday, November 16, 2024

ScrapbookPal | Pinkfresh Studio Inspiration


Welcome everyone. I am so excited to share that I am one of the new Content Creators for ScrapbookPal.com You will see me create with product from ScrapbookPal.com. This is an online craft store that carries all our favorite companies. Plus they always have some amazing deal going on. So head on over and sign up for there newsletters to get all the updates and what's new info. 

Today I am creating with:


Create card from white cardstock A2 size.

On a white panel A2 size ink blend two pinks from dark to light. Mix Copic Opaque with water and splatter your panel with it. Make sure to let dry completely before adhering to your card base. 

Die cut the large die from the Pinkfresh Studio: Dotted Fancy Frames die set on white cardstock and stamp the oranges from the Framed Art Stamp Set using Tsukineko: Memento Tuxedo Black Dye Ink pad
 ink. Fill your background and leave it uncolored. Add some Crafty Foam Tape to the back and adhere it to the center of the ink blended background. 

Die cut the Framed Art Dies on white and kraft cardstock.  On the Kraft part of the frame stencil the fun patterns using Pinkfresh Studio: Inks purple, pink, blue and green.  There are many different shades of these colors... use the ones you love. 

Adhere the white part of the frame top/bottom to the kraft base using Bearly Art: Precision Crafty Glue. Add some Crafty Foam Tape to the back and adhere it to the center of the card. 

Add some burlap twine on the top or ribbon, whatever you have in your crafty stash and tie a bow at the top. 

Stamp the sentiment and the orange image from the Framed Art Stamp Set on white cardstock using Tsukineko: Memento Tuxedo Black Dye Ink. Use the coordinating Framed Art Stencils to add the color to the image and die cut using the coordinating Framed Art Dies. Add some Crafty Foam Tape to the back of the image and adhere it to your card.  Use some fine scissors to cut around the sentiment and adhere to the card also using Crafty Foam Tape. 


Don't you just love the simplicity of this set? So many fun ways to use this set. I hope that I have inspired you today. Make sure to check out ScrapbookPal.com for a great deal on your favorite crafty supplies. 

Thank you for stopping by.

Have a crafty fun day.

Monday, September 9, 2024

Lots of Thanks....


Happy Monday blog friends. I hope you all had a wonderful weekend. I have been melting all weekend. It has been HOT here in SoCal and dang we are just not used to this HOT of weather. My air conditioner literally never turned off. That electric bill should be fun. 

Well I am still in the middle of selling my home and moving to another. It is such a tiring thing to do, but looking forward to having all my crafty supplies available. I had this set available because I just got it mailed to me for the Pinkfresh Studio class I took last month. 


Create card from white cardstock A2 size.

Ink blend a light purple and pink together on a white panel and adhere it to your card base using liquid glue.

Die cut the Pinkfresh Studio Modern Design Blocks on white cardstock and adhere to your colorful background using liquid glue.

Stamp out the lovely Cozy Blooms on white cardstock using black ink. Use the coordinating dies to add the color to the florals. My theme was pink, purple, reds and green. Die cut the images out using the coordinating die set. 

Stamp out this beautiful sentiment from the same Cozy Blooms set on white cardstock using black ink and die cut using the coordinating dies. 

Now let's adhere the sentiment first using foam tape and add the flowers around the sentiment. I did not use all the flowers. Just add them until you are happy with the look. 

Finishing with a few light pink sequins here and there. They are hard to see in the photos, but look really pretty in person. 


That is all I have for today.... 

Thank you so much for stopping by.
Have a beautiful Monday!

Friday, June 28, 2024

Hello Beautiful...


Happy Friday blog friends.. today I am sharing a Pinkfresh Studio card that is full of summer beauty. They have like the best floral sets and well this is one of them that is so simple, yet so pretty. So let's get started.


Create card from white cardstock A2 size.

Die cut the Pinkfresh Studio Floral Backdrop on an A2 panel of light blue cardstock and adhere to your card using liquid glue.

Stamp the Pinkfresh Studio Butterfly Garden stamp set on white cardstock using black ink. Use the coordinating stencils to add the color and then use the coordinating die to die cut all the pieces out. 

Die cut the Ornate Circle on white cardstock and adhere to the center of your card using foam tape.

Create your scene using liquid and foam tape. I did not use all the images but most. 

Finishing with the sentiments from the Butterfly Garden stamp set stamped on white cardstock using black ink and then die cut using the coordinating dies. 

I also added a few Spellbinders color Essentials Gems.


Don't you just love stamps that come with coordinating stencils? It is such an easy way to add the color to an image. 

Thank you so much for stopping by.
I hope you all have a wonderful Friday.

Sending you big smiles...

Friday, May 31, 2024

Using Up Your Scrap Designer Paper...


Happy Friday blog friends.. I hope you all have something fun planned this weekend. I have a few things planned but will share later next week. I have been a busy girl again... nothing related to crafty, but will share soon. 

Do you have one of these.....


This is my drawer of scrap paper. Isn't pretty?  I told you before I do not throw away good paper. I a can think of lots of ways to use this paper and today is one of the ways. 


Create card from light blue cardstock A2 size. I used Taylored Expressions Salt Water Taffy. 

Cut a piece of white cardstock A2 size and sprinkle a few colors that you love mixed with water onto the paper. Set aside and let dry completely. 

This next step is little long but bear with me. Pick out at least 20 scraps of designer paper and cut a strip to 1/4 inch of each of these designs. Adhere these strips to a piece of white cardstock measuring 4 1/2 x 11. Adhere them the short way and not the long way. So left to right, one on top of the other using liquid glue. I should have taken a photo of this... sorry. You do not need to fill the paper to the top just fill enough so we can die cut the Taylored Expressions Easy Strips 1/4 Stitched die.. We will die cut from top to bottom so it picks up some of every design that we adhered down. You should be able to die cut twice on this sheet. 

Now let's adhere 4 of the strips on the white cardstock with all the sprinkles of color. Let's adhere them using foam tape. Trim off access. Trim down your white cardstock following the lines of the strips, leaving a bit of white still showing. The top and bottom have about a 1/2 inch of the white left. 

Adhere this fun panel to your card base. Of course it will be at an angle as that is the way we cut the paper. 

Adhere the rest of your designer strips to a piece of white cardstock. make sure it is big enough to cut a circle out of. I die cut the medium circle from the Pinkfresh Studio Fold Edge Circle. When die cutting make sure to die cut the circle on half of the designer paper and the other half on the white. This will give you a cool circle. BUT we are not done yet. Cut the circle in half along the line where the designer paper is at. Adhere the designer paper circle to the top of the white part of the circle leaving a hint of the white showing (see picture). I know sounds complicated but it really is not. 

Adhere your circle to the card using liquid glue. See placement in photo. 

Add a small sentiment to the card that is stamped on white cardstock ink black ink. I cut a little angle on the sentiment to is matches the angles on the card. 


That is it for today... what do you think? Is it weird or do you think it is cool like I do? This should give you a good idea how my brain works... LOL 

Have a blessed weekend.
Thank you so much for stopping by. 

Wednesday, March 27, 2024

Lots of Love...


Happy Wednesday everyone. It is the end of March and we are headed to April. It is time for all the flowers to bloom and the sun to shine bright. I am sure those who live with snow weather is really for a little sunshine. We are always ready for the next season... right? Funny how that works. Well today I am created Spring on a card with all these pretty flowers, so let's get started. 


Create card from white cardstock A2 size.

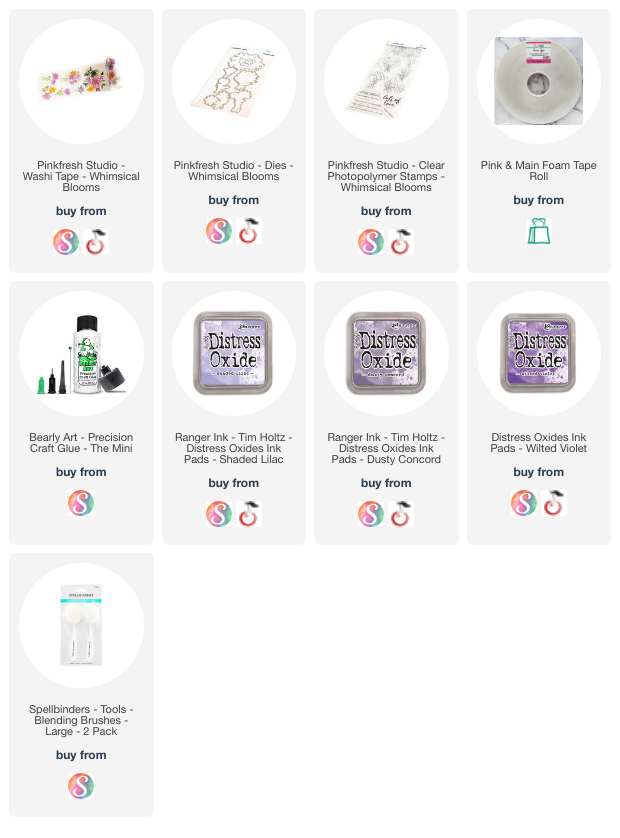
Cut a panel on white cardstock A2 size and ink blend some purple inks. I used Ranger Oxide Inks Shaded Lilac, Dusty Concord and Wilted Violet. After you ink blend the panel, sprinkle a little water on the ink and then tap off the excess with a paper towel. Don't rub the paper towel but tap it on the panel. Let aside and let dry completely. 

On a piece of white cardstock use the Whimsical Blooms tape and stick it to the white cardstock. The tapes have these amazing images so there is no coloring, no stenciling just stick  the tape to the cardstock. I highly recommend getting the coordinating die set as it lines up perfectly with the tape and the stamp set and cuts out each image perfectly. 

Add some foam tape to the back of the floral images and create a flower filled scene on your card. 

Stamp out the sentiment from the Whimsical Blooms stamp set on white cardstock and die cut using the coordinating dies. there is only a die for the LOTS OF LOVE so the other sentiment just trim down and adhere both sentiment using foam tape. 

Finishing with a little sparkle with Pinkfresh Studio Lavender Jewels. I added three of them by adhering them with liquid glue.

Adhere your panel to your card base using liquid glue.


Don't you just love how simple this card is? I only own one of the tapes that Pinkfresh Studio has and I am telling you it can be used over and over. There is plenty on the roll and sure does make for easy card creating. 

Thank you for stopping by.
Have the most wonderful day.


Tuesday, February 13, 2024

Love Surrounds You...


Happy Tuesday everyone. Today I am in a floral mood so I am getting crafty with Pinkfresh Studio and lots of it, so let's get started. 

Pinkfresh Studio supplies used:
  • Peony Fantasy Stamp/Dies and Stencil
  • Essentials: Ornate Circle Die
  • Ornate Rectangle Frame Die
  • Geometric Tile Stencil 
  • Coral Reef, Ballet Slipper, Grassy Knoll, Meadow, Peach Fuzz and Emerald City Premium Dye Inks.


Create card from white cardstock A2 size.

Cut an A2 panel on white cardstock and stencil the Geometric Tile stencil using the inks listed above. Adhere the stenciled panel to your card base using liquid glue.

Die cut the large Ornate Rectangle Frame on white cardstock. Keep the two pieces together and add some foam tape to the back and adhere it to your stenciled background. 

Die cut the Ornate Circle on light pink cardstock, add some foam tape to the back and center it onto your card. 

Stamp out the pretty Peony Fantasy stamp set on white cardstock using black ink. Use the coordinating Peony Fantasy stencils to add the color to the images. I used the colors listed above in the supply list. Now die cut the images using the coordinating Peony Fantasy dies. 

Now time to create your floral scene. Use foam tape and liquid glue when placing your flowers. 

Stamp out the sentiment from the Peony Fantasy stamp set on white cardstock using black ink. Trim down and add it to your card using foam tape. 

Finishing with a little sparkle. 


Lots of pretty Peony's. I really love this set, so many fun ways to arrange these on a card. 

Thank you for stopping by.
Have a wonderful Tuesday!

Wednesday, November 22, 2023

For You...


Hello blog friends... I hope you all are having a great week. I bet you all are enjoying all the Black Friday sales... right? I may have taken advantage of a few of the sales. I am all about saving money. I even purchase a new light box, it is not here yet but I cant wait to try it out. My light box is too big and well my craft room is a little smaller than my last three rooms.  I'll let you know or you might be able to tell if my pictures look better. Stay tuned for those results.. LOL

Today I am mixing it up a little with:

Create card from white cardstock A2 size.

Die cut the Sparkling Diamonds background die on kraft cardstock and adhere it to your card base.

Die cut the Essentails Ornate Circle on blue cardstock, add some foam tape to the back and adhere it to the center of your card.

Die cut all the Petite Blooms out on colored cardstock. You can really choose any colors you like, I went with some bolder colors. Adhere the pieces with parts to complete them and now lets create your floral scene. I really did not have a plan I just layered until I liked it. 

Die cut the tag and sentiment on any color cardstock, I went with red. Add some foam tape to the part that you are tucking back behind the floral design. 


Lots of die cutting and no stamping... You know die cutting all these little flowers/foliage takes a while but is so worth it when you see it all come together. 

Thank you for stopping by.

Have a wonderful THANKSGIVING DAY.

Many blessings to you and your family. 

Friday, October 27, 2023

Bring Joy...


Friday, Friday... oh my. I am finishing my week with more Christmas fun. Everyone would love an envelope full of gifts popping out like this one... right? 

Today's card was created using Pinkfresh Studio:


Create card from white cardstock A2 size.

Die cut the Sparkling Diamonds Background on a piece of light pink cardstock and adhere to your card base. 

Stamp out these adorable Holiday Gifts images on a piece of white cardstock and using the coordaitning Holiday Gifts stencil you will add the inks Opulence, Atlantis, Spanish Moss, Mulberry Blush and Lush Forest. There are 4 stencils so you really can go wild with color. 

Die cut the images using the coordinating die.

Die cut the small envelope from the Holiday Gifts die on a piece of white cardstock. Stencil the envelop pattern using black ink. This stencils lines up perfectly to the envelop. 

Take all those cute images and start stuffing your envelope. Go wild and fill it up. There is no wrong way. You might have to use some Double Sided Adhesive Foam here and there when overlapping some of the images. 

Stamp the sentiment from the Holiday Gifts stamp set on a piece of white cardstock and die cut using the Holiday Gifts coordinating dies, add some Double Sided Adhesive Foam to the back of the sentiment and then add it to your cute envelope. 

Add some Double Sided Adhesive Foam to the back of the envelope and adhere it to your card base.

Finishing with a little sparkle using the Ice Clear Drops here and there. 

Oh yeah, I almost forgot about that black and white strip I added to the bottom. Just cut a strip of striped black and white designer paper (so many companies sell this) and adhere it to the bottom of your card using liquid glue.


Although I know you can not get this set yet, You can still create a similar card using other products as I know many companies sell dies with small envelops. You can fill your envelope with all sorts of fun images. Go wild and have fun creating.

Thank you so much for stopping by.
Have a wonderful weekend..

Remember to smile today.

Tuesday, October 24, 2023

Warmest Wishes...


Welcome blog friends.. How about a big pretty snowflake? I love this new Pinkfresh Studio Folk Snowflake. Bad news is I don't think you can buy it yet. This was part of their Create & Connect virtual event that I attend in September. I think they said they will release it but not sure when. 

Supplies used..


Create card from white cardstock A2 size.

Stamp the Folk Snowflake one the upper right and lower left using black ink on a separate piece of white cardstock measuring A2 size. 

Use the Folk Snowflake coordinating stencil to add the Pinkfresh Studio: Hydrangea, Eucalyptus and Peony inks. Blend the color lightly. 

Stamp the Folk Snowflake again on another piece of white cardstock using black ink. Add the color using the coordaitning stencil and Pinkfresh Studio: Hydrangea, Eucalyptus and Peony inks. Die cut this snowflake out and add some foam tape to the back and add it to the center of the other two on the solid panel. 

Adhere your lovely panel to the card base using liquid glue.

Add a few of those pretty Spellbinders: Spectrum AB Color Essentials Gems for a little sparkle. 

Stamp out the sentiment from the Folk Snowflake stamp set on a separate piece of white cardstock using black ink and die cut using the coordinating dies. Die cut two more times and adhere them to the back of the stamped sentiment. This adds dimension to the sentiment. Adhere the sentiment to the center of the snowflake. 


Don't you just love sets that have it all when creating? I used one set to create this card and it is so easy to pick your favorite colors to make it colorful. 

That is all for today.

Thank you so much for stopping by.

Wednesday, September 27, 2023

Sunshine...


Happy Wednesday everyone... wow we are getting closer to October and with September winding down we are headed to all the fun holidays, that are right around the corner. yippee...

Today I am getting crafty with Pinkfresh Studio:
  • Summer Blooms Stencil/Dies
  • Foiled Sentiments 3 die cut
  • Ornate Rectangle Frame (exclusive from class)
  • Floral Backdrop Coverplate Die
  • Clear Drops (ice)


Create card from white cardstock A2 size.

Die cut the Floral Backdrop on pink cardstock. 

Cut a piece of yellow cardstock to fit directly behind the die cut Floral background. If you look closely you will see the center of the embossed die cut flowers have yellow.

Die cut the large Ornate Rectangle Frame twice on white cardstock and adhere them together. Now added them to your Floral background. Trim on each edge so you do not see the pink in the corner. 

Adhere your background to your card base.

Die cut the Summer Blooms on white cardstock. Leave the die cut attached and in place so you can stencil the design. The stencils line up perfectly. Once you have added all the color, lift the last stencil and create your scene on your lovely backgrounds.

Add one of the Gold foiled sentiments from the die cut sentiment 3 collection using foam tape. 

Finishing with a few of those fun clear drops (ice)


These gold sentiments are hard to photograph. I had a hard time getting it so you can read it, so sorry for the not so great photos. I think the card is much prettier in person but still wanted to share. I hope you like it. 

Thank you for stopping by.
Have a wonderful Wednesday!

Wednesday, July 12, 2023

Black & White...


Hello blog friends.. Well I did not have a card yesterday... oops! I just could not get my crafty act together but I got a special package yesterday and will share what that happy package was soon. But for today I have created another floral card. I just love flower cards and well here is another. LOL

Today's card was created using...

  • Pinkfresh Studio: Handpicked Flowers stamp/stencil/dies
  • Taylored Expressions: Easy Strips 1/4 Stitched die


Create card from white cardstock A2 size.

Stamp the image from the Handpicked Flowers on a separate piece of white cardstock using black ink. Use the coordinating stencil to add the color to the image. The stencils line up perfectly and are super easy to use. Now die cut the image out using the coordinating die. 

Die cut the TE Easy Strips on white and black cardstock and adhere two black and two white, rotating the colors in the center of the card. 

Take a separate piece of black cardstock and line it up to the bottom half of the card and adhere to the card. Trim off the access. 

Add some foam tape to the back of your Handpicked Flowers image and adhere it to the card. 

Mask the image and the cover the top half of the card and sprinkle a bit of white Copic Opaque to the black area only. Let dry.

Mask the image and cover the black part of the card and sprinkle a little black ink mixed with water. Let dry completely.

Stamp out the image from the Handpicked Flowers on a separate piece of white cardstock using black ink. Die cut using the coordinating die and adhere the sentiment to the card. 


A few extra steps but really simple to create. Totally fun card to create. I love how the image pops from the background... what do you think?

That is all for today.

Thank you so much for stopping by.

Friday, February 24, 2023

Being There...


Hello blog friends... I am staring out my weekend with a storm that blew in. It has been crazy windy and now started to rain. They say the storm is going to passing through the US. I think this is the windiest I have been seen here in CA. This is the perfect day for crafting and well I have chosen a design that took some time to create so let's get started...

Card designed using..
  • Pinkfresh Studio: Geo Tiles die
  • Pinkfresh Studio: Whimsical Blooms stamp/stencil/die combo
  • Pinkfresh Studio Inks: Sparkling Rose, Coral Reef, Grassy Knoll, Apricot, Berrylicious, Sweet Mustard and Sunshine 
  • Premium cardstock: Lawn Fawn: Sunflower, Taylored Expressions: Watermelon, Raspberry Sorbet and Pink Champagne

Create card from cardstock A2 size.

Die cut the Geo Tiles 4 times on 4 different colors of cardstock. The colors I used are listed above in the supply list. 

Cut a piece of white cardstock 4x5 1/4 and adhere the Raspberry Sorbet Geo Tiles border to it. 

Now you will take different parts of the negative cuts of the Geo Tiles and fill in the color leaving a bit of the white showing though. This will take some time but the outcome is worth it. 

Stamp the Whimsical Blooms stamp set on white cardstock using black ink. Using the coordinating stencils blend the chosen inks to create these colorful flowers. Die cut the flowers when all the color is added using the coordinating die. 

Adhere the die cut flowers and create a fun floral scene. 

Finishing with a sentiment from TE Mini Strips You're the Best stamp set. 


Lots of color on one card. This card took me about an hour to create but totally worth it... don't you think? 

Thank you so much for stopping by.

Have an awesome Friday!

Make sure to stop by again tomorrow for my Pink & Main post.